5 Crucial Safety Tips for Using Wall-Mounted Pull-Up Bars
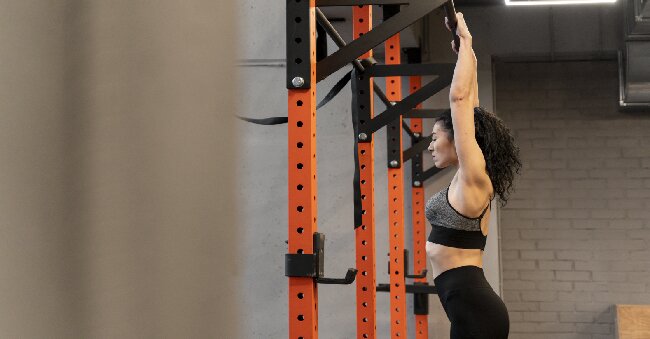
If you are considering enhancing your fitness routine, a wall-mounted pull-up bar in your home gym might be a suitable option. It provides convenience, versatility, and space-saving advantages, allowing for a challenging upper body workout.
Before commencing the installation procedure, take into account aspects such as wall material, ceiling height, weight limit, and available space. By following these crucial tips, you can safely install your wall-mounted pull-up bar and begin working towards your fitness objectives.
Why Install a Wall-Mounted Pull-Up Bar?
The installation of a wall-mounted pull-up bar in a home gym provides a convenient and effective means of improving one’s fitness regimen. This essential exercise equipment facilitates strength training through bodyweight exercises, allowing individuals to target various muscle groups for a well-rounded workout experience.
Incorporating a wall-mounted pull-up bar not only aids in strengthening upper body muscles like the biceps, back, and shoulders but also involves the core muscles for stability. This versatile equipment offers a variety of exercise options beyond standard pull-ups, including leg raises, hanging knee tucks, and modified push-ups, enabling users to tailor their workout routines to align with their fitness objectives. Its space-saving design is compact and provides a swift and efficient workout solution for individuals with busy schedules seeking to maintain their fitness levels without compromising on quality.
1. Convenience
A key advantage of a wall-mounted pull-up bar is the convenience it brings to your home workout space. It enables you to pursue your fitness objectives through a customized routine, whether that involves following a structured workout plan, engaging in self-directed training, or seeking professional training guidance.
The versatility offered by a wall-mounted pull-up bar ensures that you can effortlessly integrate exercise into your daily schedule without the need to travel to a gym. This convenience helps you maintain regularity in your workouts, leading to incremental advancements and enhanced physical well-being. The accessibility of a pull-up bar at home motivates you to prioritize your health by participating in consistent physical activities, which can improve your strength, stamina, and overall fitness levels over time.
2. Versatility
The versatility of a wall-mounted pull-up bar is demonstrated through its adjustable height, various grip options, and the capacity to perform a range of pull-up variations that target specific muscle groups. This flexibility enhances bodyweight fitness routines, improves grip strength, and supports shoulder health through calisthenics exercises.
Incorporating a wall-mounted pull-up bar into a workout regimen enables individuals to modify the bar to different heights, accommodating various exercise requirements. By utilizing different grip styles like wide, narrow, or neutral grips, individuals can activate different muscles including the back, biceps, and shoulders. This not only presents the body with new challenges but also contributes to overall muscle growth.
The array of pull-up variations offered by the bar promotes increased stability and flexibility, enriching calisthenics training while also fostering shoulder health and strength.
3. Space-saving
The wall-mounted pull-up bar offers not only functional benefits but also serves as a space-saving solution to optimize the workout area. The installation process is efficient and involves utilizing tools like a stud finder and appropriate hardware for load-bearing support to ensure a secure attachment to the wall surface with various anchoring options.
By carefully locating the studs in the wall, individuals can identify the most structurally sound areas for mounting the bar. Using proper hardware such as heavy-duty brackets, high-quality screws, and durable bolts is essential for creating a safe and stable setup. These components work together to distribute weight evenly and prevent the bar from becoming loose during intense workouts.
Following manufacturer guidelines when selecting anchoring options is crucial to match the specific requirements of the wall material and guarantee a long-lasting, secure fit.
What to Consider Before Installing a Wall-Mounted Pull-Up Bar?
When installing a wall-mounted pull-up bar, it is important to take into account factors such as the wall material and strength, ceiling height, weight capacity, and available space for proper mounting. It is crucial to ensure secure attachment to studs, use wall anchors as necessary, and maintain on-center spacing for a safe and efficient installation.
Verifying the compatibility of the wall material with mounting hardware is essential to avoid damage or accidents. Checking the weight capacity of both the bar and the wall is necessary to confirm they can safely support the user’s weight. Proper spacing not only impacts the stability of the bar but also contributes to comfortable usage.
Recognizing the significance of evenly distributing the load across multiple studs for optimal support is essential for a durable setup. By considering these factors, individuals can enjoy a reliable and safe workout experience with their wall-mounted pull-up bar.
1. Wall Material and Strength
The material and strength of the wall are essential factors in installing a wall-mounted pull-up bar. Before mounting it, ensure that you have the necessary tools for installation and take precautions to achieve a secure attachment capable of supporting the equipment’s weight capacity.
It is crucial to assess the wall material carefully before starting the installation process. Different wall types, such as drywall, concrete, or brick, require specific mounting methods to ensure the durability and stability of the pull-up bar. Using anchors, bolts, or brackets suitable for the wall surface is crucial to prevent accidents or damage. Always verify the weight capacity of the bar and the wall’s load-bearing capacity to prevent any mishaps. Following these steps diligently will ensure a safe and dependable setup for your pull-up bar.
2. Ceiling Height
Considering the ceiling height is crucial when installing a wall-mounted pull-up bar to ensure there is enough overhead clearance for comfortable use. Proper alignment during the installation process is important for the safety and effectiveness of the equipment.
Having adequate clearance above the pull-up bar not only helps prevent head bumps or restrictions during workouts but also allows for a full range of motion. Accurately measuring the ceiling height is essential to avoid any errors that could result in improper installation. Ensuring precise alignment of the bar guarantees that it can support the user’s weight without any risk of detachment or instability. By focusing on these details, users can establish a safe and enjoyable environment for their strength training routines.
3. Weight Limit
Understanding the weight limit of the wall-mounted pull-up bar is essential for safe mounting and usage. Implementing proper safety precautions and anchoring options based on the weight capacity ensures a secure and reliable installation.
This awareness is helpful in determining the maximum load the pull-up bar can handle, reducing the risk of breakage or accidents during workouts. Following manufacturer guidelines is crucial to ensure the wall is structurally sound and compatible with the weight limit. Proper mounting techniques, such as using heavy-duty hardware and securely attaching the bar to wall studs, are vital for maintaining stability. Considering the user’s weight and any additional stress factors on the bar is important when selecting the appropriate anchoring options, like concrete anchors or wall brackets, to support the designated weight capacity.
4. Available Space
When considering the installation of a wall-mounted pull-up bar, it is important to assess the available space. This involves looking at horizontal spacing, vertical clearance, and determining if the bar is suitable for outdoor use. Properly utilizing the space ensures that the equipment is placed optimally and functions as intended.
Before selecting the installation location, it is crucial to measure the horizontal space to ensure there is enough room for movement during exercise routines. Additionally, considering the vertical clearance above the bar is essential to prevent any obstructions while performing various pull-up exercises. When installing the pull-up bar outdoors, factors such as durability and weather resistance are important to ensure the equipment lasts and can be used safely. Efficient use of the space not only improves the appearance of the setup but also creates a safer and more effective workout environment.
How to Install a Wall-Mounted Pull-Up Bar Safely?
The installation of a wall-mounted pull-up bar involves a detailed process that includes proper techniques, step-by-step guidelines, necessary precautions, and ongoing maintenance practices to ensure safety and secure fit during both installation and use of the equipment.
To start the installation process, one should choose a sturdy wall in a suitable location for the pull-up bar, ensuring the wall can support the bar’s weight capacity and allows enough space for proper movement during workouts. It is important to locate wall studs or use wall anchors for secure mounting. When drilling into the wall, a level should be used to ensure the bar is straight and properly positioned. Following the manufacturer’s instructions for assembly is crucial, and regularly checking the bar’s stability is recommended to prevent accidents. Periodic inspection for signs of wear or loosening screws is also advised to maintain the pull-up bar’s longevity and safety.
1. Choose the Right Location
Choosing the appropriate location for a wall-mounted pull-up bar is essential to ensure a secure fit and proper alignment during installation. Proper positioning of the bar improves safety and usability during workouts.
Factors to consider when deciding where to mount the pull-up bar include ceiling height, wall material, and available space. The height should permit full extension during exercises without any obstructions. It is important to select a robust wall capable of supporting both your weight and the strain from repetitive movements. Correct placement guarantees sufficient space for a complete range of motion and reduces the likelihood of injuries. Strategic positioning of the bar also contributes to a comfortable and effective workout session.
2. Measure and Mark the Mounting Holes
Before installation, precise measuring and marking of the mounting holes are essential to achieve a level and secure attachment for the wall-mounted pull-up bar. Utilizing tools such as a level and drill facilitates accurate placement of the equipment.
- Begin by positioning the pull-up bar against the desired location on the wall, ensuring it is centered and at the correct height.
- Use a pencil to mark the positions of the mounting holes.
- Verify these markings with a level to guarantee they are straight and aligned correctly.
- Carefully measure the distances between the holes to confirm they match the spacing on the bar.
- Once all markings and measurements are accurate, use a drill with the appropriate bit size to create the mounting holes, ensuring to drill straight into the wall for a secure and stable fit.
3. Drill Holes and Install Anchors
Installing a wall-mounted pull-up bar securely involves drilling holes and using the appropriate hardware. Tightening the anchors securely in the wall boosts the stability and longevity of the installation.
To start the drilling process, it’s crucial to select suitable wall anchors based on the type of wall. For drywall, consider toggle bolts or anchor screws capable of supporting the pull-up bar’s weight. For concrete or brick walls, it’s advisable to use expansion anchors or sleeve anchors for a secure installation.
While placing the anchors, ensure they are spaced correctly to evenly distribute the load. Use a level to confirm the bar will be mounted straight, and follow the manufacturer’s instructions to tighten the hardware properly, ensuring a safe and robust attachment.
4. Attach the Pull-Up Bar to the Wall
Installing the pull-up bar on the wall involves the use of brackets, screws, and bolts in the installation process. Ensuring a stable connection by securely fastening the bar to the wall is crucial to withstand the weight capacity and user movements during workouts.
- Choose a suitable location on the wall for mounting the bar, ensuring there is enough overhead clearance for unrestricted movement.
- Utilize a stud finder to locate the wall studs and mark the attachment points for the brackets.
- Align the brackets with the marked spots and use a level to ensure they are straight.
- Drill pilot holes through the bracket mounting holes into the wall studs.
- Insert the provided screws or bolts from the pull-up bar kit and tighten them securely to the wall to create a strong and reliable attachment.
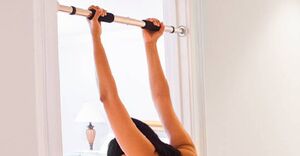
5. Test the Stability and Make Adjustments if Needed
After attaching the pull-up bar, testing its stability and making necessary adjustments ensure a safe and reliable setup. Conducting a thorough safety inspection post-installation ensures that the equipment is secure and ready for use.
Testing the stability of the wall-mounted pull-up bar involves gently applying pressure while hanging on the bar. It is important to ensure that the bar is securely fastened and can bear your weight without any wobbling or shifting. If any movements or instability are noticed, it is advised to stop immediately and re-examine the mounting hardware. It is essential to make sure all bolts and screws are tightened properly to provide maximum support.
Once confidence is gained in the stability of the pull-up bar, it is safe to proceed with using it.
https://nutroone.com/en/product-category/fitness-accessories/pull-up-bar/
Related Posts
Olympic Barbells: Transform Your Workouts with 5 Powerful Benefits Over Standard | NutroOne
Are you looking to level up your weightlifting game? We…
5 Powerful Differences: Olympic Barbells vs. Standard Barbells for Your Fitness Goals | NutroOne
Are you looking to step up your strength training game…
Top 7 Powerful Pull-Up Bar for Your Home Gym | NutroOne
Looking to enhance your home workout routine? Check out these…
No Comments