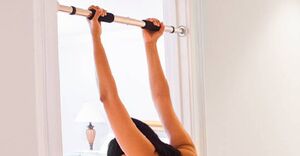
Unlock the Top 7 Incredible Benefits of Ceiling-Mounted Pull-Up Bars for Your Home Workout | NutroOne
If you are considering upgrading your home gym setup, one option to explore is installing a ceiling-mounted pull-up bar. This type of equipment can save space, offer versatility, and contribute to strength and muscle mass improvement.
This article provides information on the advantages of a ceiling-mounted pull-up bar, considerations to keep in mind prior to installation, a detailed guide on how to install it, and safety tips for effective use. By exploring these aspects, individuals can make the most of their home gym potential.
The Benefits of Having a Ceiling-Mounted Pull-Up Bar
A ceiling-mounted pull-up bar is a practical and versatile addition to a home gym setup, designed to save space and allow individuals to focus on strength training and fitness goals effectively.
With its compact design, this type of pull-up bar is ideal for maximizing limited room space. The sturdy construction ensures durability, providing a stable foundation for a variety of upper body exercises. Installing a ceiling-mounted pull-up bar at home provides easy access for convenient workout sessions, encouraging regularity in fitness routines.
This equipment targets multiple muscle groups simultaneously, aiding in muscle building and upper body strength development, facilitating efficient progress in fitness journeys.
1. Saves Space
By choosing a ceiling-mounted pull-up bar, valuable floor space in the home gym area is saved, allowing for optimization of the available space for other fitness equipment or workout activities.
This space-saving solution maximizes the use of vertical space, converting the home gym into a more functional and efficient workout area. With the pull-up bar attached to the ceiling, floor space is freed up for activities such as weightlifting, yoga, or cardio exercises.
Making use of the overhead space not only aids in decluttering the workout area but also contributes to a more contemporary design, creating a more spacious and welcoming environment for fitness routines. The compact design of the ceiling-mounted pull-up bar exemplifies the idea of space optimization in home gyms.
2. Provides Versatility
A ceiling-mounted pull-up bar provides a versatile platform for a variety of exercises, including different pull-up variations and bodyweight workouts, allowing individuals to customize their workout routines and target various muscle groups effectively.
The adjustable features of ceiling-mounted pull-up bars allow users to modify the height and grip positions based on their preferences, enabling a more personalized and challenging workout experience. By incorporating bodyweight training with exercises like hanging leg raises, knee tucks, and static holds, individuals can enhance their strength-building capabilities and overall fitness outcomes. This not only introduces variety into the routine but also aids in improving stability, core strength, and muscular endurance.
3. Increases Strength and Muscle Mass
Utilizing a ceiling-mounted pull-up bar regularly in a workout routine can result in notable enhancements in strength, muscle growth, and overall fitness levels, helping with achieving strength and muscle toning objectives effectively.
Incorporating pull-ups into a regimen can notably improve upper body strength by targeting various muscle groups such as the back, shoulders, arms, and core. The action of pulling the bodyweight up activates these muscles, fostering muscle endurance and toning. This compound exercise also helps in enhancing grip strength, which is crucial for various strength training exercises and daily tasks.
The consistent involvement of several muscle groups during pull-ups fosters a more balanced muscle development and functional strength, rendering it a valuable component of any strength training program.
Factors to Consider Before Installing a Ceiling-Mounted Pull-Up Bar
When installing a ceiling-mounted pull-up bar, it is important to take into account several key factors. These include evaluating the strength of your ceiling, verifying the weight capacity and durability of the pull-up bar, and assessing the complexity of the installation process.
One critical consideration during the installation of a ceiling-mounted pull-up bar is confirming that your ceiling is appropriately reinforced to bear the weight and strain of the bar when in use.
It is imperative to check the weight capacity of the pull-up bar to ensure it can adequately support the intended user. Additionally, the durability of the bar is essential for its longevity, particularly if it will be subjected to frequent use.
Lastly, it is advisable to factor in the level of difficulty involved in the installation process. This assessment should be based on your own DIY proficiency or the potential requirement for professional assistance to guarantee a secure and stable setup.
1. Ceiling Height and Structure
- The first step in the installation process of a ceiling-mounted pull-up bar involves evaluating the height and structure of the ceiling to ensure the ceiling joists can adequately support and reinforce the secure mounting of the bar overhead.
- It is essential to measure the distance between the ceiling and the floor to establish the optimal height for the pull-up bar. Check the condition of the ceiling joists to verify they are in good condition and capable of bearing the weight of both the bar and the user.
- If the joists are deemed insufficiently strong, it may be necessary to strengthen them with additional lumber or utilize a mounting plate for added support.
- It is crucial to securely attach the bar to the ceiling to prevent accidents or damage, so it is imperative to adhere to the manufacturer’s instructions and utilize appropriate mounting hardware.
2. Weight Capacity and Durability
When choosing a ceiling-mounted pull-up bar, it is important to verify its weight capacity and durability. It is recommended to select a heavy-duty and robust construction that can endure the intensity of your workouts and offer long-lasting performance.
Ceiling reinforcement is a critical factor to consider as it is essential for supporting the weight of the pull-up bar without causing any damage to the ceiling. It is advisable to look for pull-up bars constructed from durable materials such as high-grade steel or reinforced alloys to ensure they can withstand heavy loads and frequent use without bending or breaking. Opting for a pull-up bar with superior durability not only improves safety during workouts but also ensures a dependable fitness accessory that can last through numerous rigorous training sessions.
3. Installation Difficulty
The difficulty of installing a ceiling-mounted pull-up bar should be considered based on one’s expertise and the availability of tools. It is important to ensure that the installation process aligns with the setup of the home gym and the requirements of the workout space.
When installing a ceiling-mounted pull-up bar, one crucial factor to consider is the structural integrity of the ceiling to support the weight and movement during workouts. It is advisable to locate ceiling joists or studs for secure mounting, using a stud finder for accuracy. The ceiling height should be assessed to ensure proper clearance for pull-up bar exercises. Following the manufacturer’s instructions carefully is essential to avoid installation mistakes that could compromise safety or stability. These precautions can help optimize the workout space and improve the home gym experience.
How to Install a Ceiling-Mounted Pull-Up Bar
- To install a ceiling-mounted pull-up bar, specific steps need to be followed. These steps include gathering the necessary tools, locating and marking studs, pre-drilling holes, attaching mounting brackets securely, and finally installing the bar. This will allow for the pull-up bar to be enjoyed in a dedicated workout space.
- After ensuring that the tools are available, the next important step is to locate and mark the studs on the ceiling where the pull-up bar will be mounted. It is crucial to attach the bar to ceiling joists to guarantee its stability and safety during use.
- Following this, holes should be carefully pre-drilled into the marked spots to accommodate the mounting brackets. Once the brackets are securely in place, the installation process can be completed by securely attaching the pull-up bar. This final step is essential for maximizing the workout potential of the newly installed pull-up bar.
1. Gather Necessary Tools and Materials
To start the installation of a ceiling-mounted pull-up bar, it is important to gather all the necessary tools and materials for the process. Make sure you have everything required to set up your home fitness area efficiently and securely.
Required tools and materials for installing a ceiling-mounted pull-up bar include:
- a stud finder to locate suitable support beams in the ceiling
- a drill with appropriate drill bits for making holes
- a tape measure for precise positioning
- a level for ensuring proper alignment of the bar
- the hardware provided with the pull-up bar kit
It is also recommended to have a ladder or stool to reach the ceiling safely and consider using a pencil to mark drilling spots. Having these items readily available will simplify the installation process and assist in creating a stable and dependable workout station in your home.
2. Locate and Mark Studs
Find the studs on the ceiling to determine where to drill holes and attach the mounting brackets of the ceiling-mounted pull-up bar for proper support and alignment during your workout routine.
Begin by using a stud finder to locate the studs in the ceiling. Once located, mark these spots with a pencil or tape. It is important to maintain proper spacing between the mounting brackets to ensure stability and safety while doing pull-up exercises.
Before drilling, make sure that the chosen positions align with your workout area, providing enough space to perform exercises without any obstacles. These steps will not only improve the effectiveness of your workouts but also reduce any risks related to incorrect installation.
3. Pre-drill Holes
Drilling the necessary holes in the marked locations on the ceiling is essential to securely accommodate the mounting brackets and ensure overhead stability for the ceiling-mounted pull-up bar in the designated workout area, facilitating effective strength-building exercises.
This crucial installation step requires precise measurements and alignment to establish a safe and robust setup. It is important to ensure that the brackets are evenly spaced and aligned with the ceiling joists to provide maximum support. To accurately locate the joists before drilling, use a stud finder. When drilling, begin with a pilot hole that is slightly smaller than the screws to prevent wood splitting. Gradually increase the drill bit size to match the screw diameter for a secure fit. Following these steps will help create a dependable foundation for your strength training routines.
4. Attach Mounting Brackets
Ensure the mounting brackets are securely attached to the pre-drilled holes on the ceiling to provide proper ceiling attachment and reinforcement for supporting the workout intensity and exercises performed using the ceiling-mounted pull-up bar.
This step is crucial for establishing a stable foundation for your pull-up bar installation. By firmly securing the mounting brackets to the ceiling, you can guarantee that the bar remains in place even during demanding workout sessions. Proper reinforcement of the ceiling is vital, especially for high-intensity exercises such as weighted pull-ups or muscle-ups. The strength and stability of the attachment directly impact the safety and effectiveness of your workouts, so it is important to double-check the installation to ensure a secure fit. With a correctly mounted pull-up bar, you can confidently challenge yourself to reach new fitness goals without concerns about equipment failure.
5. Install the Bar
The pull-up bar should be installed onto the mounting brackets securely, with the ceiling reinforcement effectively supporting the bar’s weight. This setup helps in gaining strength, improving muscle endurance, and optimizing gym space for efficient workouts.
Proper installation of the pull-up bar is essential not only for maximizing workout space but also for ensuring safety during exercises. By securely mounting the bar onto the reinforced ceiling brackets, a stable foundation is created that can withstand intense workouts. This allows individuals to focus on improving strength and endurance without distractions. A well-installed pull-up bar enhances the workout routine and adds versatility to the home gym setup, providing opportunities for challenging and effective exercises.
Tips for Using a Ceiling-Mounted Pull-Up Bar Safely
For safe use of a ceiling-mounted pull-up bar, it is important to:
- Check the weight capacity before beginning a workout.
- Maintain proper form during exercises.
- Warm up and stretch before starting.
- Pay attention to your body’s signals.
- Take breaks as necessary for a safe and effective exercise routine.
Creating an optimized workout space around a ceiling-mounted pull-up bar is crucial to enhance convenience and safety. Ensuring the area is clear of obstacles and clutter can help prevent accidental falls or injuries. Installing mirrors or adequate lighting may be considered to monitor form and posture during exercises. By optimizing the workout space, one can increase the effectiveness of pull-up routines and reduce the risk of accidents. Emphasizing functionality and comfort in the setup can make workouts more enjoyable and beneficial.
1. Check Weight Capacity Before Use
Before beginning the workout on the ceiling-mounted pull-up bar, it is important to confirm that the bar’s weight capacity meets your requirements and guarantees solid construction for safe and efficient exercises engaging multiple muscle groups in your designated workout area.
Maintaining a secure and stable pull-up bar is essential to prevent accidents or injuries during your workout routine. It is advisable to verify the weight limit to accommodate your body weight and any additional weights you intend to use. Understanding how different exercises target various muscle groups can assist in customizing your workout to effectively focus on specific areas. Optimizing your workout area includes ensuring sufficient space for proper movement and confirming that the ceiling-mounted pull-up bar is securely anchored to support your weight and movements.
2. Use Proper Form
Maintain proper form and technique when using the ceiling-mounted pull-up bar to promote muscle toning, endurance, and maximize workout intensity. Ensure secure attachment to the ceiling for safe and effective exercises that enhance your fitness journey.
This is essential not only for reaching desired fitness goals but also for injury prevention. By focusing on form, you engage targeted muscles more effectively, leading to improved toning and endurance development. To optimize workout intensity, consider varying grip positions and incorporating slow, controlled movements. Make sure the pull-up bar is securely installed on the ceiling following manufacturer guidelines to prevent accidents during workout sessions. Remember, consistency in technique and form is crucial for fully benefiting from your exercise routine.
3. Warm Up and Stretch Beforehand
It is important to prioritize warming up and stretching before using the ceiling-mounted pull-up bar. This helps to prepare the muscles and joints for the workout and ensures that the ceiling reinforcement can support your strength gains, muscle development, and overall fitness progress within the designated workout space.
Warming up and stretching play crucial roles in preventing injuries and optimizing workout sessions with the ceiling-mounted pull-up bar. Proper warm-up routines improve blood circulation, flexibility, and range of motion, making the muscles more responsive during exercise. Incorporating stretching exercises that target key muscle groups sets the foundation for effective muscle development and growth when using the pull-up bar. Properly reinforcing the ceiling provides a safe and secure environment for strength-building exercises, allowing for maximized gains and progress in the workout space.
4. Listen to Your Body and Take Breaks
Pay attention to your body’s signals while using the ceiling-mounted pull-up bar during your workout, and make sure to take breaks as necessary to avoid overexertion. This will help ensure that your gym setup and ceiling reinforcement provide a convenient and safe environment for your upper body workout routines.
This mindful approach not only helps prevent potential injuries but also improves the effectiveness of your fitness routine. Your body gives you signals about its limits, offering important feedback on when to rest and recover. By listening to these cues and strategically incorporating rest periods, you can enhance your workout experience and achieve better results.
Having a well-designed gym space with strong ceiling reinforcement not only enhances your physical safety but also boosts your confidence and concentration during your upper body exercises.


No Comments